Wall Mile 36

Wall Mile 36 [HB 231–50]

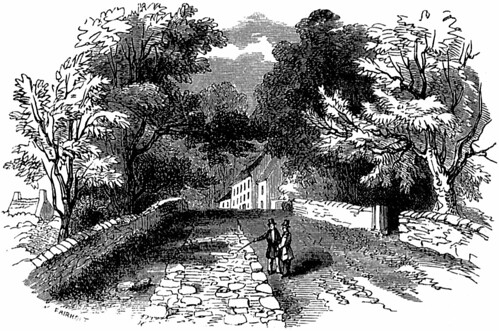
We now descend into another gap, climb another hill, and then start to head gently downwards along Kennel Crags towards the plantation that precedes the valley of the Knag Burn. The Military Way is with us to the south (indicated by a broad grassy swathe for the most part). Further down the dip slope is the Vallum, die-straight as ever. Near the plantation, a hint of ditch survives to the north of the field wall, but it has not been identified over the rest of the Knag Burn valley, even though it might have been anticipated. Out the other side of the wood and we can now see the Roman gateway near the Knag Burn stream itself.

Heading towards the Knag Burn valley

Heading towards the Knag Burn valley

The valley of the Knag Burn was not only the site of the bath-house for Housesteads but also a lime kiln (neither now visible) and that gateway through the Wall. Do not go through the modern gate; stay on the southern side if you wish to inspect Housesteads (why wouldn’t you?!), but first let’s cast an eye over the gateway.

Knag Burn Gateway [HB 232]

The Knag Burn gateway with Housesteads beyond

The Knag Burn gateway with Housesteads beyond

The gateway, thought to have been built during the 4th century and examined in the mid-19th century, consists of two towers, one on either side of a single portal. As such, it is not particularly noteworthy, but it does give us a clue what the gateways on Roman roads at Carlisle, Portgate, and (possibly) Newcastle looked like. This, however, is not on a major road, but rather a minor route, perhaps a pre-existing transhumance route. Interestingly, there were two sets of pivot holes and it has been suggested that two sets of gates were in use at the same time. Clearly, there may have been other gates along the Wall which have not as yet been found.

Keeping to the south side of the fort, we can pass round the outside of the south-east corner of the fort and make our way through the excavated civil settlement to the museum to get our tickets. On the way, examine the outer face of the fort wall and note the long Crunchie-bar-like blocks typical of late rebuilding: this is one heavily patched fort!

The recently refurbished museum has a small video presentation, a compact display about the site incorporating some of the finds (including a thoroughly well-selected case dealing with the military equipment; just thought I’d mention it…), as well as a bijou shopportunity.

Housesteads fort (VERCOVICIVM) [HB 233–49]

Housesteads fort

Housesteads fort

By dint of visitor numbers alone, Housesteads is the best-known and most popular Roman fort in Britain, and with good reason. For many, it is Hadrian’s Wall. It lies 7.6km (4.75 miles) from Carrawburgh, but only 3.2km (2 miles) from the Stanegate fort of Vindolanda (the older name for which, Chesterholm, is seldom used now). It is oriented east to west, in order to fit it into the limited available space at the end of the dolerite ridge above the gap through which the Knag Burn flows. As it is, it occupies 2ha (5 acres) and still slopes quite considerably inside.

There was no ready source of fresh water within the fort, although there is the Knag Burn down the hill which supplied the bath-house down there. Therefore, quite unusually for a British fort and more in keeping with its cousins in Jordan or Syria, Housesteads was dependent upon the collection of run-off from roofs and road surfaces, so great attention was paid to the provision of water tanks. This in turn allowed the flushing of the latrine building in the south-east corner of the fort.

Housesteads from the air

Housesteads from the air

The garrison was the cohors I Tungrorum milliaria, which moved there from Vindolanda (the Tungri originated west of the Rhine, around the Ardennes). It was later supplemented by a cuneus Frisiorum and the numerus Hnaudifridi, both quite clearly Germanic in origin. The depiction of an archer on a sculpted panel from Housesteads (now in the Great North Museum, so we can see it later) has led to the suggestion that a detachment of cohors I Hamiorum (who we know were based in the Stanegate fort of Carvoran) may have been based there at some point (and they came from Hamah in Syria).

From the museum, we can make our way to the entrance to the fort (which has recently reverted to the south gate, after many years of being through a gap in the south wall near the south-west corner), but should pause briefly on the way to look at the exterior of the south-west corner, noting those Crunchie-bar-shaped blocks of stone that were used to repair it in the late Roman period.

The first thing to observe about this double-portalled gateway is that it has been adapted and the east tower has acquired an additional structure, since this was a fortified medieval farm, notorious in its day for the unruly nature of its inhabitants, as well as a corn dryer in its eastern tower. The south gate itself had its east portal blocked (and the blocking removed by 19th-century excavators). The central pier (or spina) between the portals contains two fine examples of pivot holes for the gates, each with channels to allow the gate leaf to be fitted. Looking up the hill from the gate, we are looking along the via principalis (the main short-axis street) from the porta principalis dextra (or south gate) towards the porta principalis sinistra (or north gate, which we can’t actually see because of the shape of the hill). So now it is time to go exploring the central range, since this is the first fort we have encountered that will let us explore all three principal components.

Courtyard of the CO's house

Courtyard of the CO’s house

First, on our left-hand side, we see the commanding officer’s house (praetorium). Although it conforms to the Mediterranean-style, high-status courtyard dwelling, it is a radically unusual example: the awkward terrain has forced its builders to terrace it into the hillside. The south-eastern corner contained a stable, whilst the east and west wings climb up the slope to the north wing, which is considerably higher than the south and has been taken to imply a second storey at the lower level (thereby pre-empting the medieval Borderers’ habit of living above their animals). The courtyard in the centre is worth a look, as it has been paved in a late phase with still more Crunchie-bar-shaped blocks and even bits of window head (monolithic blocks with a semi-circular cut-out, imitating an arch, that acted as lintels above window openings): heritage hardcore as crazy paving. The north range has a series of rooms with underfloor heating, something of a prerequisite for this area in a winter, but actually a common feature in commanding officers’ houses everywhere. The commander and his familia (his slaves being included within that term) lived and worked within those four ranges of rooms, socially delineated, functionally adapted, and decidedly terraced.

The HQ building

The HQ building

Now we move uphill to the principia. The headquarters building is a fine example of its kind. Entering from the main north to south street (the via principalis, if you recall), we enter the first of the three components of this building: the courtyard. Open to the elements, but surrounded by a peristyle, it harked back to the days when the centre of a Roman camp was its forum, where the soldiers could assemble. The Romans had no gutters on roofs, so there was an eavesdrip round the courtyard which channelled the run-off into the drainage system. Moving westwards, we proceed into the cross-hall, a high covered structure with additional entrances at each end (to our left and right). To our right is the raised podium or tribunal (yes, that’s where we get the English word from) from which the commander could address his troops, or more likely, his centurions at the daily morning briefing (for which we have documentary evidence from other sites), when the daily password was set and unit statistics passed on. Beyond is the rear range of offices, with the shrine of the standards, the aedes principiorum, directly in front of us. This is placed so that it is visible from the porta praetoria, in this case behind us, to the east. Offices on either side of the aedes contained the clerks who handled unit administration and looked after the records.

The hospital at Housesteads

The hospital at Housesteads

Immediately to the west of the headquarters building is an additional courtyard structure. Since another house seemed unlikely, the excavators decided this must have been a valetudinarium or hospital. All forts had them (the example at Vindolanda is mentioned in the famous writing tablets) so it is not an unreasonable deduction, although the evidence (similarity with other, larger, such structures) is circumstantial, rather than conclusive (like, say, a lopped-off limb or two or a set of medical implements). Rooms were arranged on four sides around a courtyard, one of them suggested as an operating theatre (it is bigger than the others), and with a latrine incorporated in the south-west corner of the structure.

The west end of the granaries

The west end of the granaries

The fort had two granaries, to the north of the HQ, but they are rather unusual, since it has been suggested they may originally have constituted one large structure. A central row of column bases, subsequently concealed between the north wall of the south granary, and the south one of its northern neighbour, are one clue, whilst those two butted partitions, inserted between the end walls, are another. If we stand at the west end of the northern granary, in its doorway, there are a number of useful things we can note. To the east is the interior, with its floor (long gone now) raised on small stone columns or pilae; these, together with the ventilator slots in the side walls, allowed air to circulate beneath the floor to keep the contents cool and (it is always said) discourage (but not necessarily completely defeat) vermin. The threshold upon which we are standing is in fact a loading platform, against which carts could be backed up, so that gives us a good idea of street level here in the Roman period. Looking down, you can see that sockets and openings reveal that there were once two inward-opening doors here. If feeling energetic, we can nip round to the south side of the south granary to see more evidence of the adaptation of this fort building into a medieval farm: another corn dryer in the middle of it.

Just north of the granaries, beyond another store building squeezed into the available space, we find the remains of Turret 37b, demolished (along with a stretch of Hadrian’s Wall) once it was decided to construct Housesteads. The north wall of the fort was pushed further north, right to the lip of the slope, to gain as much room as possible, hence the need to level the existing curtain wall.

The levelled remains of Turret 36b and the curtain wall

The levelled remains of Turret 36b and the curtain wall

The north gate now has an imposing drop below its external threshold, but this is a result of a causeway having been removed during the 19th-century excavations. We can stand near the edge and look at the usual attributes of a gateway, most notably marking-out lines which facilitate the placing of the massive opus quadratum blocks of the gate piers and jambs.

The north gate from the exterior

The north gate from the exterior

Between the north gate and the north-east corner, the Romans suffered repeated problems with the stability of the wall now that it was placed nearer the edge of the slope. This was compounded by the habit of removing the rampart to insert rampart-back buildings like workshops, then demolishing them and putting the rampart back! Anyway, several collapses later, they started reinforcing the back of the much-abused rampart, the back of which (marked now by lines of kerb stones) crept ever further across the road towards the barrack. What started out with room to drive a cart along ended up barely wide enough for a single person to get through. Excavations showed those workshops were busy working with leather (mainly cobbling, since the water tanks ended up full of old shoes, betrayed by their hobnails), blacksmithing, and casting copper-alloy equipment.

The ever-narrowing north-east rampart

The ever-narrowing north-east rampart

Things had also gone a bit wrong at the north-east corner of the fort at a very early stage. Placing the angle tower in the correct position meant, inconveniently, that it was not at the junction with Hadrian’s Wall itself (one wonders at which point this was noticed!), so that was demolished and a new tower placed slightly to the west of it. This speaks volumes about how the whole story of the Wall was one of adaptation (or fudge, the unkind might observe).

Barrack XIII

Barrack XIII

Two barrack buildings, XIII and XIV, have been consolidated in their late ‘chalet’ form, with each contubernium in the form of a separate hut, but more standard long barracks were located beneath them and some of the walls were reused in the later versions. The officers’ buildings were at the east end of the buildings and one of them contained a piece of a hackamore from a horse harness (on display in the museum). Next to Barrack XIV, to the south, was Building XV, originally a storehouse and later adapted to contain a small bath-house. Note those Crunchie-bar-shaped stones yet again used in its reconstruction. East of the two barracks is a late interval tower, but that is perched (rather precariously) on top of a larger Hadrianic bakehouse that was found to contain two circular bread ovens (which you can no longer see), presumably one for each barrack.

Intact blocking in the east gate

Intact blocking in the east gate

The east gate has a potent piece of folk mythology associated with it, the ruts in the threshold block supposedly influencing the Standard Gauge of 4ft 8½in (1.435m) adopted by Stephenson for his railways. The debunking of this myth is done with the aid of horses’ bottoms (naturally). The axle width of a cart is dictated by the need to comfortably fit a horse into the poles; hence modern carts resemble Roman carts in a lot of details, including axle width. Since railways evolved out of the horse-drawn waggonway carts that hauled coal along Tyneside from mine to staithe, also one horse’s width, we have our equally interesting, but less romantic, answer: it’s a coincidence.

Moving on downhill, we see the remains of an ascensus or stairway to the south of the east gate. This is one of the means by which soldiers got onto the rampart walkway. Next there is another interval tower before we reach the heavily modified south-east corner tower and its attendant facilities.

The latrine building in the SE corner

The latrine building in the SE corner

This corner provides everybody’s favourite bit of Housesteads: the latrine. This much-sniggered-over piece of functional engineering was flushed by water held in the large header tank with the scalloped edges, the water passing clockwise around the inner channel so that soldiers’ sponge sticks could be rinsed, and then anti-clockwise around the sewer beneath the seating space, finally debouching through an arched outlet straight into the civil settlement. Property prices in that area were probably rock-bottom. The scalloping around the tank has caused some comment, it often being suggested that this was caused by soldiers sharpening blades (unlikely, since hones, found by the dozen in the fort, were a much more efficient way of doing that). It may instead have been caused by washing clothes, the slight downward trend of the ‘scallops’ being a possible indication of this. Like much of life, if you have to sum up Hadrian’s Wall (and certainly Housesteads), you can probably do it with this latrine.

Now, how keen are you on gates? For the sake of completeness, you should see the splendid west gate on the far side of the fort but we shall be understanding if you decided to skip this part of the tour; we can leave you sitting morosely on part of the site (assuming it’s not raining, which it does quite a lot at Housesteads). Two portals again, both ultimately blocked (the northern first, it is suggested), and the north pier surviving to the height of the arch springer. Slots can still be found to secure the gates, as can the usual sockets, threshold blocks, and more marking-out lines.

Outside the fort are some of the vicus buildings. Next to the south gate is the House of the Beneficarius [sic] (yes, there were even spelling errors on old Ministry of Works signs), and further down the hill is the inspiringly named Murder House (you’ll never guess what happened there: two Roman bodies under a newly laid floor, one with the tip of a blade between the ribs). Don’t make the mistake of thinking the circular well enclosure is Roman; that belongs to Housesteads’ long history as a farmstead, rather than a Roman fascination with building circular structures with no apparent entrance.

If you’re hungry for more, you can find further photos of Housesteads here.

Leaving the fort, we pass up the exterior of its western wall and make for the plantation and a rare treat: the only chance to actually walk on the curtain wall. Once upon a time, walkers merrily yomped along the top of the wall in the central sector without giving much thought to the damage they were doing. Increases in visitor numbers mean such access has had to be limited to this one carefully controlled section, here in the woods immediately west of Housesteads fort. It should be pointed out that the drop to the north is a bit hairy and there is a popular climbing pitch along here. Occasionally, richly accoutred climbers will pop up whilst you are heading along the top. Smile benignly at them and pass on. The vertiginously inclined can walk on a path immediately to the south of the curtain wall, but still in the plantation; should you be dendrophobic, then you can take the Military Way west from the fort (a broad mown strip) and skip the woodland altogether.

A chance to walk on Hadrian's Wall

A chance to walk on Hadrian’s Wall

Before long, we come down off the wall and exit the plantation. Now, just a short cavort up a bit of a hill, we stumble across Milecastle 37.

Milecastle 37 (Housesteads) [HB 250–4; haiku]

Milecastle 37

Milecastle 37

Milecastle 37 is perhaps the most visited, by dint of the fact it is closest to Housesteads (which enjoys the highest visitor numbers for Hadrian’s Wall), and is within staggering distance for the more adventurous car-bound visitor. It is presented in the same Claytonized form as the curtain wall on either side, facing stones reconstructed up to a regular height and topped with turf. It has been excavated four times between the middle of the 19th and end of the 20th centuries and, quite apart from offering an excellent sheltered location for a walker’s lunch, provides our first insight into the nature of the milecastle.

Beginning with the north gate, we can see that the reduction in width to pedestrian access is still in place. Comments are occasionally made that it is daft to provide gateways for some of the milecastle along the crags, but access would have been needed along the front of the curtain wall and ditch for the purposes of maintenance and many afforded some sort of rudimentary route to the north, the pedestrian blocking being a recognition of the fact that this was probably usually not by wheeled vehicle. In fact, the most recent excavation showed how partial collapse of the north gate led to its being blocked soon after construction and only opened up for pedestrian access at a later date. The lowest two voussoirs of the southern arch of the north gate are still in place on either side, but the others have been replaced in recent times for effect (a drawing of 1879 by James Irwin Coates shows those two springers, as they are known, in situ).

There is one internal building, east of the central north–south roadway, whilst the only excavated sign of a western structure here was a couple of hearths.

The interior and north gate of Milecastle 37

The interior and north gate of Milecastle 37

The south gate is less well-preserved than its northern companion but still stands to an impressive height and shows the use of responds on either side of the gate itself. ‘What’s a respond?’ you cry; it’s the sticky-out bit on either side of the jamb (upright) of the doorway. Why would you care about responds? Because they are one of the identifying factors that distinguishes the three (or four) types of milecastle gateway (which scholars think mark construction work by different legions). What do they do? They carry the archway over the gate; so now you know.

Wall Mile 27

Wall Mile 27 [HB 191–210]

Just before we reach the bridge at Chollerford, there is a small, ingeniously counterbalanced gate to our left and that leads to a path that takes us along the side of the old railway line to the Roman bridge abutment, a distance of about 800m if you must know.

Chesters bridge abutment [HB 191–4]

The bridge abutment at Chesters

The bridge abutment at Chesters

The bridge abutment nestles in a copse of trees on the southern riverbank and is still an impressive monument. The curtain wall is terminated in a large square tower, thought to have housed a waterwheel (since it has a leat leading into it, although it isn’t clear where the water went afterwards). The abutment itself is a large apron constructed of opus quadratum blocks, each layer originally held together with cast lead strips (you can still see the channels for these in the surface of the stones) rather than with cramps between blocks.The surfaces of most of the blocks contain central lewis holes. A lewis was used on large blocks of stone to enable them to be lifted with sheer legs. A three-part wedge with a central removable shackle (known as a three-legged lewis or St Peter’s Keys) was inserted into a splayed rectangular hole in the stone which, when the middle component was inserted, would lock in place to be lifted. It is a characteristic Roman technique, not seen before and seldom afterwards in Britain.

The lewis

The lewis

Embedded within the apron, thought to have been constructed as part of a 2nd/3rd-century makeover of the bridge, we can still see the outline of one of the piers of the original Hadrianic bridge. Looking down on the abutment from the riverbank side, move towards the northern (upstream) end and look at the basal courses. On the second row up, and assuming the abutment is not flooded (it often is), careful examination will reveal yet another truly outstanding example of a phallic symbol. Again, good luck was obviously as important as a lead lattice in holding together a Roman bridge. Finally, in the stone park beneath the trees, are the remains of a crane, probably used in the construction of the structure, whilst lying down on the apron opposite it is a decorative column that originally adorned the bridge parapet.

Apron with lead lattice channels and decorative column

Apron with lead lattice channels and decorative column

Now we must retrace our steps along the path back to the road, then turn left over the modern bridge. This had a medieval predecessor just downstream, but it is the Roman prototype even further away to which we now turn our attention. It is best to cross to the northern pavement for safety’s sake to actually cross the bridge. At the roundabout, we follow the signs across two roads until we finally get to the Military Road again (it is the third round anti-clockwise, the way we are forced to progress). We make our way along the road for some 640m before we find the entrance to Chesters, the first of the English Heritage forts on the Wall. Be careful walking into the site since, bizarrely, there is no pavement for pedestrian visitors (I always march long the white cross-hatched area in the centre of the driveway, but that’s just me).

Chesters fort (CILVRNVM) [HB 195–209]

Plan of Chesters

Plan of Chesters

Chesters is important for many reasons, not least as the house (The Chesters) was the home of John Clayton. In the 19th century, he was one of the leading lights in the conservation of the central sector of the Wall. The happy coincidence of the Military Road choosing to avoid the crags between Wall Miles 34 and 45 and Clayton owning the estate that included that stretch, combined with his passion for archaeology, meant that this part of the Wall at least received more care and attention than it had since Roman times. Elsewhere, at that time, landowners and tenants were still merrily grubbing it up and even dynamiting it in some extreme cases. Any suggestion that the curtain wall might have survived in any substantial form had the Military Road not been built is, at best, debatable.

The fort itself is 5.6km (3.5 miles) from Carrawburgh and is 2.3ha (5.75 acres) in area. It sits astride the Wall and needed two extra gateways (instead of the usual four) to accommodate this inconvenience. Within the fort, the remains of the commanding officer’s house and the headquarters building (including its subterranean strongroom) are on display, as is part of a pair of cavalry barracks. Down by the river North Tyne are the remains of the fort bath-house, preserved to an impressive height by hillwash. Naturally, John Clayton set about excavating parts of the fort. Set in formal parkland, it can now look rather lush and incongruous in comparison with some of the bleak upland (or even urban) sites.

The best strategy for a visit to Chesters is to see the site first and then do the museum, but you do what you feel most comfortable with, and you may find the weather dictates your course of action. For our purposes, it is the fort first.

Unlike any of the other forts we have seen to the west, Chesters does not cower meekly behind the line of the curtain wall but in fact boldly protrudes to the north. This provided an unusual challenge to its constructors since, if they used the usual pattern of four gateways, one side (either north or south) would end up with three gateways, the other only one. They opted to give it an extra two ‘minor’ single-portalled gates to the south of the wall and have three twin-portalled ones to the north of it.

The north gate and aqueduct channel

The north gate and aqueduct channel

Any tour of the fort will begin at the north gate, to which the path from the museum leads you. This is the porta praetoria, the main gate facing northwards and, importantly (and unlike Housesteads), facing the enemy. A twin-portalled gateway (the normal configuration for Wall forts) this was the main one facing into Barbaricum. There is a very obvious stone-lined channel under the western carriageway – drains and aqueducts nearly always left and entered forts at the gates. This example, however, is the aqueduct bringing water into the site (the main sewer carrying it out passed out through the slightly lower east gate, as we shall see). The aqueduct channel seems to have followed the contours round Lincoln Hill to get to the fort, with its source reported to be further up the valley of the North Tyne (although this has not been tested by excavation). An inscription of either AD 181–5 or c.AD217 records the construction of an aqueduct, although we have to presume the garrison didn’t spend the best part of half a century without water, so it may have been an additional one or a replacement.

Hadrian's Wall at the junction with Chesters fort west wall

Hadrian’s Wall at the junction with Chesters fort west wall

Having admired the north gate (the usual two portals, one later blocked, with flanking guardrooms) we can head off across the fort (there is usually a mown strip to guide us) towards the west gate, noting as we pass it a short length of the western curtain wall of the fort before we reach our goal. The northern guard chamber has very obviously been re-used as accommodation at a later date, since it has had a hypocaust inserted to keep its inhabitants cosy (and a fragment of it remains in the north-west corner). Adjacent to the south tower we can see the junction of Hadrian’s Wall with the fort, confirming that this west gate lay north of the wall. The curtain wall was in fact constructed before the fort and had to be dismantled to insert the fort. The usual features are present (threshold blocks with door stops, pivot holes, large opus quadratum blocks in the spina and inserted into the guard chamber walls) so we may note those and move on.

The path next takes us to the south-western interval tower (the western minor gate and the south-western corner tower have not been uncovered for display) where we can see that, unlike the turrets we have so far seen on Hadrian’s Wall, this fort tower has a central doorway at its base. We may briefly admire the eavesdrip channel along the base of the tower before trotting on towards our next gate (there are six, don’t forget, only one of which is not on display). We can move on to the south gate, another twin-portalled structure, but this one still retaining traces of its blocking. This may be the point at which we should note for future reference that the construction of twin-portalled gateways and the subsequent blocking of one of those portals is a common theme at Roman forts; quite why is a matter for some thought. Propped up against this one is a large monolithic slab with a central lewis hole and two pivot holes, one of them intact. This is an example of an upper pivot stone, designed to sit above the spina and receive the upper pivots of the gate leaf on either side of it.

The south-east angle tower

The south-east angle tower

Moving on, we pass another interval tower before reaching the corner tower, located in the centre of the rounded south-east corner of the fort wall. Unlike interval and gate towers, corner towers tended to be wedge-shaped, so that their side walls met the curtain wall at a tangent in either case. It is less noteworthy that this too has a central doorway.

Now we head north along the east defences and reach the only minor gate that is displayed. This, as mentioned above, was a single-portal gateway which gave access to the area south of the Wall and specifically to the civil settlement and the baths. Note that in its surviving form, there are two gate leaves (one pivot hole on either side) with a central stop block.

Minor east gate

Minor east gate

And so to the last gateway, the main east gate. Here we can see a main drain passing out through the southern portal, but it is of course north of the wall, so not destined for the bath-house. The northern gate tower has been constructed over the backfilled (with rubble) ditch of the original version of Hadrian’s Wall. Both portals ended up being blocked and the lack of wear on the threshold blocks suggests neither were very heavily used. So much for all that effort to add extra gates.

Main east gate and drain

Main east gate and drain

After this heady tour of the defences and an orgy of towers and gates, it is time to turn our attention to the internal buildings that are there to be inspected. The first will be the commanding officer’s house (praetorium), the nearest and most perplexing of the structures, given the welter of inserted hypocausts, varying floor levels, and different styles of construction. If we enter it through the little gate next to the tree, we are immediately able to admire the finely moulded decorated plinth course on the north-east corner of the structure. Just to the south are some brick pilae from one of the many heating systems, but if you are willing to take a few paces even further south you will find an excellent example of a brick-arched flue through the east wall. Don’t worry, we’ll wait. We will next move a little to the west to see another heated room with a raised threshold, showing the level the commanding officer actually lived at, with all this heating technology at his disposal. Note how the threshold block is worn smooth in the middle and that there are two rectangular recesses on either side to receive the upright stone jambs, now missing. Doubtless you will already have spotted the channel leading to the socket for the door pivot. We will carry on moving westwards and make a left turn towards where the courtyard ought to be. The floor levels are still raised to either side of us and it becomes apparent that the standard courtyard-style praetorium has here been subverted in the later period, with additional rooms being added in the courtyard space. If we turn right we can now head west again, across where the courtyard would have been, and make for the headquarters building (principia).

Cross-hall and part of the courtyard in the HQ

Cross-hall and part of the courtyard in the HQ

The HQ has entrances on either side of the cross-hall, as well as its main northern one, these side entrances apparently serving more than one purpose. The one nearest the praetorium would certainly provide a useful short cut for the commanding officer, but the threshold of this eastern doorway shows clear evidence of wheel ruts, implying that carts were driven into the building on a regular basis. You may well wonder why this might have been. Let us enter the structure through the door and examine the cross-hall, noting the dais (the tribunal) ahead of us (this one clearly had a hatch underneath it; what were they storing there? And was it brought in with carts?). To our left, in the range of offices, is a magnificent, vaulted underground strong room, where the unit savings would be kept (perhaps the carts were moving money around!). Mileage may vary as to whether we may enter it (sometimes it is flooded), but note how small the steps are (best to go down with your feet sideways) and the large monolithic stone jambs used here.Remember those sockets for jambs at Brunton Turret? These are of the same kind.

When we are done here, we can head across the cross-hall again and enter the courtyard. As ever, we find a peristyled rectangular yard with an eavesdrip running round it, indicative of a pent roof, and over in the north-west corner is a well (which still often contains water) which is worth inspecting. A few moments may be devoted to pondering the well and its sacred significance before turning to face the south and the rear range of offices, where the standards would be kept. Look down at the paving on the western side of the courtyard. There, on a large circular boss, is one of the largest phallic symbols we have yet witnessed. This seems like a formidable apotropaic insurance policy. Before leaving, it is worth noting that the newly built Hadrian’s Wall was quickly demolished here in order to construct the fort and excavation on the northern edge of the HQ building found the remains of Turret 27A, removed soon after construction.

Now we can turn and head northwards, across the courtyard and out of the main entrance of the HQ, and towards the barrack buildings ahead of us.

The barracks at the time of excavation

The barracks shortly after excavation

Before entering the barracks enclosure, we should pause and note that not all of the barrack buildings are on display. Only five of the contubernia, the rooms in which the men were accommodated, are now uncovered, at least three more remaining buried beneath our feet. In front of us are two symmetrically arranged buildings, each with officers’ quarters at the far end and a verandah (continuing the roofline) in front of the men’s rooms. A central drain (originally covered) runs along the centre and fragments of columns can be seen (although Gibson’s photographs of the first excavations suggests things have moved around a bit since the 19th century). The barrack rooms housed the men, possibly with a central timber partition separating a front storage area from the rear sleeping area, whilst the end rooms would house the decurio who commanded each turma of cavalry (nominally 32 men) and his NCOs, including his deputy (the duplicarius, on double pay), the standard bearer (signifer), and the sesquiplicarius (on one-and-a-half times pay!). Before we leave the barracks, we need to do a quick calculation. Remember that there are eight men to a room and 32 to a turma? If we have at least eight rooms to a barrack, then it is likely that each building housed two turmae and that the officer’s quarters at the east end were duplicated at the unexcavated west end, making a double-ended barrack (we know of such structures from other cavalry forts elsewhere in the empire). After all that maths, we may well feel that we could do with relaxing in the fort bath-house. Fortunately, Chesters has one of the best preserved.

We shall leave the barracks the same way we came in and head east past the east gate and down the hill, pausing on the way to examine a short length of Hadrian’s Wall that is exposed. Excavation a little further to the east, between here and the river, found that the first clay-bonded wall collapsed spectacularly and had to be rebuilt with mortar.

Let’s carry on down the hill to the enclosure containing the baths. Before entering, we can appreciate how the hill-wash, the soil moved downhill with time, has helped protect the building, since the tops of the standing walls reflect the profile of the hillside leading down to the riverbank. This is also a good time to recall the reconstructed baths building at Wallsend which, as I pointed out at the time, is a mirror image of the one you are now looking at.

The apodyterium of the baths

The apodyterium of the baths

Down the steps, we enter through the porch to the changing room, the apodyterium, with its niches which may have held the bathers’ clothes (although there is a view that these were niches for statues of divinities). In a small delve next to the niches you can see the original floor level, revealing that the low ledge there was in fact originally a bench, perhaps lending credence to the clothes storage hypothesis. We can now move southwards and immediately turn right and right again to look at the sudatorium, the Ridiculously Hot Room (it had its own heating system under it, separate from the main baths). This is particularly interesting as it has more surviving examples of monolithic stone door jambs, as well as a fine example of a worn threshold similar to the ones we saw in the CO’s house, complete with pivot hole and location slot. Back out of this balneal cul-de-sac and turn right into the main bathing area, with the warm room (tepidarium) and then the caldarium (hot room). We are actually standing at the level of the base of the hypocausts, the floor level being betrayed by a threshold block to our left. Before we go any further, turn round and look at the step we just came down to get here: it a curiously shaped stone. This in fact a voussoir made of tufa (light and fire-resistant), just one remaining component of a series of arches that ran along the length of the baths, slotted to hold thin bricks between these ribs and thus provide hollow tubes through which warm air (which was carried up the walls from the heating below) could also heat the roof space. All clever stuff. Now we can move towards the south end, noting the hot plunge bath to our right and, behind it, the remains of a window through the wall. The south end contained the area where the fire actually burnt, beneath a large bronze water tank (now long gone), to provide the hot water for the plunge.

The bath-house

The bath-house

We may sneakily pass out of here through the flue, noting as we go that there was a second bathing suite immediately to the east, and then we can turn left and left again to take us along the eastern side of the exterior of the building, buttressed for extra strength, to the latrines at the far end. This area has been heavily damaged by the river in the past, before it was ever excavated, but we can make out the sewer channel running around the seating area, whilst down to the right, nearer the riverbank, are examples of opus quadratum with their increasingly familiar lewis holes. We can finish with the baths by heading back along the path, around the exterior of the building, and back up the stairs. Now it is time to leave the fort, but if you haven’t already inspected it, this is your cue to visit the museum.

The museum at Chesters

The museum at Chesters

John Clayton’s son Nathaniel formed a small museum at Chesters (still lovingly tended in as near its original condition as possible) just before the First World War, housing the family collection of artefacts and inscriptions garnered not just from Chesters but from all the sites within the original Clayton estate, including Housesteads, Vindolanda, Great Chesters, and Carrawburgh. Its lapidarium is truly impressive, with rows of altars, milestones, and sculpture, and shelves of lesser stonework, including building stones from the Wall. It is worth devoting some time to and there is a treat awaiting in the back room, where some of Ronald Embleton’s original reconstruction paintings, undertaken for H. Russell Robinson’s book What the Soldiers Wore on Hadrian’s Wall, are hanging. The museum has only recently been refurbished and relit (a process that required the careful rehousing of a colony of bats) and is a splendid example of what can be achieved, and a far cry from the days when one of the past curators complained about birds flying around the main gallery and leaving their calling cards on the cases.

The garrisons of Chesters included the cohors I Delmatarum in the 2nd century and the ala II Asturum from the early 3rd onwards. The latter, a cavalry regiment, originated in Asturia, in what is now Spain. It has been pointed out that the name Cilurnum may owe something to a people called the Cilurnigi from that same area of Spain. You could say that this is a little bit of Northumberland that is forever Spain.

If peckish, we might choose to visit the cakey heaven of Lucullus’s Larder before departure and then take advantage of the English Heritage shopportunity on the way out (just remember that what you buy you have to carry), and most especially the lavatories (they are scarce beasts along the Wall).

Leaving Chesters, we turn left and cross over (carefully, naturally) to the pavement on the other side of the road. The site of Turret 27B is inaccessible to us, in the grounds of Chesters House. At the bottom of the hill the Military Road soon swings westwards, back onto the line of the Wall, to begin the climb out of the valley of the North Tyne.

As we look uphill, the curtain wall is underneath the southern carriageway of the road, with the ditch immediately north of the road, in the field to our right, and the Vallum off to the left.

The curtain wall showing through the Military Road

The curtain wall showing through the Military Road

In the 18th century, the Military Road was of course originally constructed without a tarmac surface and a famous woodcut shows one of the lower courses of the curtain wall peeping through the southern carriageway at Walwick, just to the east of Milecastle 28. It was still visible in 1907, when Maria A. Hoyer wrote ‘at this point, part of the foundation becomes visible. It gave one a thrill to look at those venerable stones; surely they merited a salute, a genuflection! The road here mounts up steeply, and the rush of the rainwater probably keeps the stones bare.’ By the time Jessie Mothersole passed here less than two decades later, the road had been tarmacked and the curtain wall was no longer visible. As we reach the point where the Trail turns right (for a rather major detour), we are opposite the site of Milecastle 28.

Milecastle 28 (Walwick) [HB 210; haiku]

This was a long-axis milecastle on the other side of the road, but there is now nothing to see.

The PLV ebooks

Wall Mile 21

Wall Mile 21 [HB 177–84]

We cross the lunar landscape of old quarrying that has removed Milecastle 21 and the Vallum and enter the pinchiest of pinch points, the Trail being sent along a narrow fenced-off alleyway at the northern edge of the fields, immediately south of the wall bordering the Military Road. We follow this past Halton Red House (to the north of the road) before we emerge into the area of Haltonchesters fort.

Haltonchesters from Down Hill

Haltonchesters from Down Hill

Haltonchesters fort (ONNVM) [HB 178–83]

Haltonchesters fort plan

Haltonchesters fort plan

Haltonchesters is 12km (7.5 miles) from Rudchester and is 2ha (4.8 acres) in area, having been enlarged from 1.7ha (4.3 acres) with a rather unusual western extension south of the curtain wall (making it the only fort on the Wall with an L-shaped plan). Its initial garrison is unknown but it may have been a mixed cohort (a combination of auxiliary cavalry and infantry). The increase in size may be because it later held the ala I Pannoniorum Sabiniana. Once again placed astride the Wall, it had six gates, allowing for three gates each north and south of the curtain wall. A large internal bath-house was excavated near the western defences, north of the modern road, in the 19th century, with barracks to the east of it. To the south of us, granaries were examined more recently, but most of our knowledge of the site comes from a detailed geophysical survey.

The fort platform at Haltonchesters

The fort platform at Haltonchesters

There is nothing to see of the site today beyond the fort platform and a few humps and bumps to the south of the Military Road, whilst to the north the fort is still under the plough.

Leaving the fort behind us, we head downhill towards a rather important little stream, one of the tributaries of the Cor Burn. By the time this reaches the Tyne next to the Roman site at Corbridge, it has been tapped by the aqueduct which supplied the Roman fort and town there and the remains of which are still to be seen on the site. The Vallum is now visible again to our left and the Military Road is once again on top of the curtain wall after emerging from the Down Hill plantation. We cross the burn and head up the other side towards the site of Milecastle 22.

Haltonchesters and the line of the Wall to Milecastle 21

Haltonchesters and the line of the Wall to Milecastle 21

Milecastle 22 (Portgate) [HB 184; haiku]

This was found to be a long-axis milecastle when it was examined in 1930 (so longer north to south than east to west), but intriguing to discover that the northern gateway was, later in its life, completely blocked (perhaps as a result of its proximity to the Port Gate gateway, which we shall soon be encountering).

roadsad

Wall Mile 13

Wall Mile 13 [HB 167–72]

We stroll gently uphill, past a line a hawthorn bushes, with the Military Road raised up to our right (and the curtain wall under it), intimations of the Vallum to our left, and the trees around Rudchester ahead of us. At the top of the field, we arrive at a gate that confronts us with a manic rat-run, with a blind corner just metres away to the left, so extreme caution must be exercised in crossing this road. Once safely on the other side and through the next gate, we have reached the fort of Rudchester.

Rudchester fort (VINDOBALA) [HB 168–71]

Rudchester fort plan

Rudchester fort plan

As we enter the field containing the fort, which lies to our right, the first impression is of an unspoiled gem, and that is partly correct. Like Benwell, Rudchester straddles the Wall (and, of course, the Military Road here) and although the southern portion displays enough humps and bumps to delight the head of any major national heritage organization, the northern part has been under the plough for many years and is a very different story. The site is actually owned by Northumberland County Council and one senses it is their little nest-egg, put aside for the day when something exciting can be done with it.

Rudchester fort platform from the south-west corner

Rudchester fort platform from the south-west corner

Rudchester fort platform has been placed in a commanding position to look to both east and west, whilst keeping one eye to the south too. The views to the north are nothing to write home about, however, but in this the fort builders were constrained by the line of the Wall and its own particular tactical requirements. Rudchester is 10.9km (6.75 miles) from Benwell and 7.5 miles from its western neighbour, Haltonchesters. It is 1.8ha (4.5 acres) in size and excavation found that the fort was built over the Wall ditch. The unit which the Notitia Dignitatum tells us was in garrison in the 4th century, the cohors I Frisiavonum, was probably there in the 3rd century as well, but the earliest occupants are unknown.

The civil settlement to the south included a temple to Mithras, known as a mithraeum, excavated some years ago but not visible. There is nothing to see now of the fort other than its platform and the Trail carefully shepherds us around the southern and western of the fort’s defences, but in so doing rewards us with a site graphic explaining the fort at the south-west corner. Sadly, there is no plaque commemorating the fact that I once dug here in horizontal snow in a trench so narrow I could barely get my arm into it. Such are the joys of archaeology…

As we leave the fort in the north-west corner of the field, we head down to the March Burn, crossed with the aid of a dinky yet serviceable bridge, before a slight climb takes us up towards the site of Milecastle 14.

Milecastle 14 (March Burn) [HB 172; haiku]

Rudchester from the site of Milecastle 14

Rudchester from the site of Milecastle 14

There is nothing to see of the milecastle, which was examined in 1946 and 2000 and found to be probably a short-axis example of its kind, but there are impressive views south towards the Tyne valley and, since it is directly under the approach to Newcastle airport, upwards at the bellies of aircraft landing at or taking off from there. A bend in the Military Road here reflects a change in course of the Wall onto an almost-due-easterly heading.

Seditio3ad

Wall Mile 6

Wall Mile 6 [HB 151–8]

We continue along West Road, cross Condercum Road using the pedestrian crossing, and then take the next left turn (Weidner Road), right again onto Westholme Gardens, then left onto Broomridge Avenue. There, on our left-hand side, is the Temple of Antenociticus. This is the only part of the substantial civil settlement that is still available for us to see, but a large bath-house was excavated by the local landowner, Robert Shafto in 1751 (whether he was the Bobby Shafto of the famous Tyneside song is a matter of debate, as several of his relatives shared the name).

The Temple of Antenociticus [HB 155–7]

Temple of Antenociticus

Temple of Antenociticus

A small apsidal building, it contains concrete replicas of the original altars, which we saw in the Great North Museum. Antenociticus was a local god (inscriptions recording him only occur at Benwell) and a stone head (also in the GNM) found here has been identified as representing the deity. The temple is comparable in size to the mithraeum at Carrawburgh and the fact that the inscriptions were set up by unit commanders may indicate he was an acquired taste amongst the social elite, rather than a popular figure. Enjoy the incongruity of the setting for a while (it can be surprisingly peaceful) and then we can return to the main road and turn left to find our next little treat.

Benwell fort (CONDERCUM)

Benwell was built after the Wall and its ditch and before the Vallum, which made a detour to the south to avoid it, and it is one of those that straddles the line of the curtain wall. The fort is 3.5km (2.2 miles) from Newcastle and covers 2.2ha (5.6 acres). The portion projecting north of the wall has been destroyed by a modern reservoir, whilst that to the south is wholly built over. It was garrisoned in the 2nd century by the cohors I Vangionum, then in the 3rd and 4th centuries by the ala I Asturum. The fact that the fort was not big enough to have contained the Vangiones, a double-strength mixed infantry and cavalry force, together with an inscription recording their presence at Chesters, has led to the suggestion that they may have been split across the two sites.

To the south of the south gate of the fort lay the Vallum crossing and that is our next destination.

The Vallum Crossing [HB 154–5]

The Vallum crossing

The Vallum crossing

Just after the Job Centre (the Plus seems slightly redundant these days) on the left, we turn right down Denhill Park. Immediately the road forks, but we can go either left or right as it is a crescent. Soon, in this urban environment, we stumble across one of English Heritage’s forgotten gems, the only surviving crossing of the Vallum (which has dodged southwards to avoid the fort) that is on display. We can either peep over the railings or, should you wish to inspect it more closely, get the key from No.26 (the bungalow in front and to the right as we look northwards from the end of the crescent); you choose.

Here we can see how a causeway has been left across the Vallum ditch (which is only about half its original depth). A culvert had been inserted, presumably to prevent (or rather reduce) ponding on the eastern side. The road across the ditch had a monumental stone-founded gateway, the base of which can still be seen, as can the sockets for the gates themselves. Behind the gateway, the road has been stepped to convey the impression of several succeeding surfaces. As we leave the enclosure, inspect the large piece of stone near the iron gate, which is a socket block that retains its original iron socket lining. We will have more to say about socketed gates and doors later on.

The line of the Vallum has been shadowing us for a couple of miles but this is our first tangible evidence for it. The Vallum originally consisted of a broad flat-bottomed ditch 6m (20 Roman feet) wide and 3m (10 Roman feet) deep, flanked by mounds to its north and south formed from the upcast. Both mounds were separated from the ditch by a 9m (30 Roman feet) flat strip or berm. The name Vallum is modern, reflecting a name given to it by Bede (using the Latin word for rampart). Its function is unknown but it is assumed to have delineated the southern limit of the frontier zone, limiting access to the gates through the Wall. What it did do, effectively, was limit the number of access points to the Wall zone. It has exerted less influence on the layout of Newcastle and its suburbs than the ditch or curtain wall (none, if we are brutally honest), but once in open countryside we shall find it yet another influence on the landscape.

After returning the key, we head back out of Denhill Park, turning left onto West Road. Continuing down a gentle hill, we reach a roundabout and cross carefully. Here there is absolutely nothing of the Wall to see, other than its continued influence on the course of West Road, but in many ways that is, as you will by now have gathered, the whole point of this suburban and urban odyssey of ours. As will become clear once we reach more open country, the line taken by the Wall was dictated by the landscape and that does not change (although it is difficult to see such influences in built-up areas they are, nevertheless, still there). The added factor now is that the Wall has, in turn, exerted a major influence on the layout of Newcastle and its suburbs.

Next comes the likely site of Milecastle 7.

Milecastle 7 (Benwell Bank) [HB 158; haiku]

The view westwards from the putative site of Milecastle 7

The measured position of Milecastle 7, although it has never been located, lies near the crest of the slope we are about to descend into Denton. As such, it has a clear line of site to Milecastle 8.

Wall Mile 3

Wall Mile 3 [HB 142–50]

Now, situated as we are at the east end of Byker Bridge, we can either choose to follow the approximate course of the Wall across the Ouseburn, or get an aerial perspective from the bridge. Wall Mile 3 is almost unique in having virtually no influence on later structures or layout in the city, which helps explain the upcoming uncertainties over its course.

Wall Mile 3

If you decide to follow the Wall, go to the left of the building at the end of the bridge and down Back Stephen Street.Then take the steps ahead and proceed down the east bank of the burn to arrive at Leighton Street. Turn right then immediately left onto Foundry Lane, then fork right onto the footpath gradually inclined up towards the viaduct, passing Ouseburn Farm on the right (which is on the posited line of the Wall). Keep on up Stepney Bank, keeping the Ship Inn and viaduct to your right. Turn right onto Coquet Street, which bends right, then left, then right again, repeatedly crossing the line of the curtain wall. We are finally reunited at the crossroads on Crawhall Road, where you will turn left.

We, on the other hand, are going to seek an aerial perspective, crossing the bridge (keeping to the southern walkway) before turning left onto Crawhall Road and being reunited with you at that crossroads.

An aerial perspective on the Ouseburn valley

An aerial perspective on the Ouseburn valley

We shall proceed down to another crossroads and turn right onto Howard Street (the Wall is now to our north). At a crossroads with Gibson Street Howards Street turns into Buxton Street and then again into Melnourne Street. Near here, excavation has identified the curtain wall with the by-now-familiar pits on the berm. Attempting to trace the course of the Wall between Melbourne Street and the Mining Institute is (and has long been) fraught with difficulties and peppered with speculation. We shall boldly continue along Melbourne Street (we are close to the line of the wall, which now runs slightly to the south of us) until we pass the 17th century Holy Jesus Hospital on our right. We now need to use the subway ahead to get across the gargantuan Swan House roundabout (passing the blue Metroradio building as we do so). On the far (west) side of the roundabout, having crossed the road to get to the south-western corner of Mosley Street, we head southwards, making for the tall building with the NHS Business Services Authority sign (‘Why?’ you ask; be patient and you will see).

The road north from the Pons Aelii, which gave Newcastle its Roman name, must have passed through the Wall near here, so some form of gateway with flanking towers is to be anticipated (we shall see an example later at Knag Burn). We turn right into a pedestrian precinct and down some steps and here we are encountering Newcastle’s ancient topography. We are descending onto Dean Street which lies on the (now subterranean) course of the Lort Burn. Crossing the street carefully we head up another set of stairs into the churchyard east of the cathedral.

Some antiquaries claimed the curtain wall passed through the cathedral, whilst others advocated that its course took it nearby, but we shall head westwards, through Amen Corner, and then turn left and make for the castle.

Newcastle fort (PONS AELII) [HB 144–8]

Newcastle fort plan

Newcastle fort plan

Newcastle was the original eastern terminus of the Wall and yet no fort was built here until the Antonine period, which was probably when the bridge across the Tyne was constructed. The fort is mostly situated underneath the castle (medieval castles frequently used the site of Roman forts) but we known it was originally 0.64ha (1.53 acres) in area. The garrison included the cohors I Ulpia Traiana Cugernorum in the 3rd century and cohors I Cornoviorum in the 4th. A stone recording the cohors I Thracum may refer to another garrison from Newcastle, or possibly from an as-yet-undiscovered fort in Gateshead. The fort does not seem to have been attached to the curtain wall (there was evidence of buildings to the north of it) and it was, rather unusually, polygonal in form.

Newcastle HQ building marked out on the pavement

Newcastle HQ building marked out on the pavement

Marked out on that piece of pavement are parts of the headquarters building (principia) and the commanding officer’s house (praetorium). The orientation of these fragments begins to allow an understanding of how the fort sat above the river. There is more to see, however. Head round to the north side of the keep, next to the railway arches, and you’ll see parts of two granaries marked out, one of them partly under the viaduct itself.

Newcastle granary marked out on the pavement

Newcastle granary marked out on the pavement

The eponymous bridge at Pons Aelii has yet to be located (dendrochronological dating of timbers supposed to have come from it proved to be medieval) but it must have been situated close to where the Swing Bridge is now situated. Recent work in Gateshead has suggested that there may have been a military base there, too (elsewhere in the empire, many bridges over major rivers had military bases at either end).

Finishing with the fort site, we must walk to the Black Gate and cross the road using the pedestrian traffic island onto Westgate Road, and proceed, keeping the railway arches to our left, until we arrive at the Mining Institute building, where the curtain wall is marked in rather faded pink concrete, accompanied by a plaque giving details..

Course of the wall outside the Mining Institute

Course of the wall outside the Mining Institute

Now it is time for a detour, before we continue following the line of the curtain wall as best we can, so head towards the railway station and look for the entrance to the Metro. We shall be making our way up to the Great North Museum – Hancock (it is worth it, trust me).

Great North Museum – Hancock

For many years, some of the best finds from the Wall were held in the Museum of Antiquities in Newcastle University (to which you will still find references in guide books), but the building has now gone (bizarrely, photographs of its flattened site are apparently discouraged!) and the contents have been transferred to the new Great North Museum just over the road. The easiest way to get to the GNM is to take the Metro (entrances both inside and outwith the railway station) up to the Haymarket station (second stop when proceeding northwards from Central Station) and then following pedestrian signs for the Great North Museum. The enthusiastic walker, or those who dislike underground travel, may choose to walk, but allow 20 minutes from Central Station to get there (via Grainger Street, Newgate Street, and Percy Street).

Inscriptions in the Great North Museum

Inscriptions in the Great North Museum

Entrance to the museum is free, photography is allowed, and the Hadrian’s Wall gallery is straight through the main entrance, on through a brief natural history interlude, before passing a couple of trees with loitering stuffed wolves (no, I don’t know what they’re doing there either). We are confronted by a huge video presentation that allows you to insert your initials on a stone block and a rather disinterested Roman soldier maunders around through a variety of weathers. Great for the kids but perhaps overkill for the rest of us. All around you will find artefacts, inscriptions, and models to explain the story of the Wall. Dive in, press some buttons, and enjoy.

When finished, we should retrace our steps (with or without the Metro) to the Central Station. The course of the Wall continued from the Mining Institute across Neville Street (which runs in front of the railway station), under the statue of Stephenson on the triangular traffic island, and then up Westgate Road, where the shop frontages follow its line, with the road itself running on the ditch (remember Fossway and Shields Road?). We now need only walk as far as the Newcastle Arts Centre.

This is also an appropriate moment to greet the Vallum, of which there is nothing to see here, but which once very clearly began near the later fort at Newcastle, lying c.150m to the south of, and parallel with, the curtain wall. We shall have more to say about it at Benwell, when we can see something tangible.

Milecastle 4 (Westgate Road) [HB 150; haiku]

The site of Milecastle 4

The site of Milecastle 4

Scholarly calculations had long been baffled by the location of this (as it turns out) long-axis milecastle, not least because of the uncertainties we have just encountered over the course of Wall Mile 3. In 1985, its discovery in the backyard of the Newcastle Arts Centre during the digging of a drain led to Milecastles 5 and 6 being shuffled along a bit from their old hypothetical locations to new hypothetical locations, and all was better. Its position is marked in the Black Swan Yard behind the Arts Centre.

CGHad

Wall Mile 0

Prestumble

If you are actually considering walking the Wall, there are many good reasons for doing it from west to east. It is far, far better than going east to west. You’ll find my blog for that walk online for all to read for free, or you can get the ebook for a modest consideration. However, if you are determined to walk it east to west, then digitally is the best way (at least the wind and rain in your face will be virtual).

Our journey begins next to the remains of the former Swan Hunter shipyard, where the Wall apparently once ran into the river. Once, by all accounts, Geordie kids paddled and splashed around its remains, but that time has long gone. For us, Wallsend is the start of what we shall boldly term our Echtmauerwanderung along Hadrian’s Wall: a stroll per lineam valli (literally ‘along the line of the Wall’). This has one distinct virtue: the Wall is only 118.4km (73.5 miles) long, whereas the National Trail is 137.0km (85.1 miles), so we don’t have to walk so far but get to see more Wall!

Anyway, without more ado, let’s start at the very beginning. If you require more detail, feature headings include references to the appropriate page in the latest edition of Collingwood Bruce’s Handbook to the Roman Wall (and the map includes clickable links to other resources drawn from English Heritage’s PastScape website, DeFRA’s MAGIC mapping base, and – occasionally – from romanbritain.org).

Milecastle 0 [Not mentioned in the HB; haiku]

Although it has been suggested that the curtain wall may have begun with a riverside milecastle, there is as yet no evidence to support this notion, but redevelopment of the former shipyard may ultimately provide clarification on this point.

Wall Mile 0 [HB 371]

The Branch Wall

Branch Wall as excavated

The Branch Wall as excavated

Branch Wall now

The Branch Wall now

Before entering the fort and museum of Segedunum, head east along the main road for a few yards, then immediately right, and make your way up onto the bridge that takes the cycle path round the back of the fort. Heading west, you will soon see your first piece of Hadrian’s Wall. This bit is known as the Branch Wall and it is this that ran down into the Tyne. This bit has actually been moved a couple of times (it was found further to the south when the slipway for the RMS Mauritania was being built in 1903, moved to a nearby park, then back again when Segedunum was opened) but it is not the most mobile piece of the Wall. That distinction belongs to a fragment of the Branch Wall that was in a display case on the RMS Carpathia (which was fitting out at Wallsend at the time of its discovery) and appears to have been present when that ship went to the aid of the Titanic. It may even have been the only piece of Hadrian’s Wall to have been sunk by a U-boat in 1918! There is a model of the Carpathia upstairs in the industrial section of the museum, but no model of the U-boat.

Wallsend fort (SEGEDVNVM) [HB 131–8]

Plan of Wallsend fort

Plan of Wallsend fort

Wallsend is very far from the best-preserved fort along the line of the Wall; we shall see better examples of virtually all of its features. However, it is the only one that lays all of them out for our appreciation, and even offers a convenient tower from which to view them. The order in which we proceed around Segedunum (the name, which is Latinised Celtic, means something like ‘strong fort’) is a matter of taste, but for our purposes we shall visit the site first and then look at the museum.

Wallsend fort was built when the Wall was extended eastwards from the original terminus in Newcastle during the Hadrianic period, after the initial construction phase was well under way (so probably well into the AD120s). Occupying 1.6ha (4.1 acres), it was only some 6.4km (4 miles) from the next fort at Newcastle. The garrison was cohors II Nerviorum in the 2nd century and cohors I Lingonum in the 3rd and 4th centuries and both of these were auxiliary units that contained a mixture of infantry and cavalry (in other words, a cohors equitata). On Hadrian’s Wall, the legions did most (but not all) of the building and the auxiliaries most of the garrisoning (but, again, apparently not all).

Before the campaign of excavations in the 1970s, the fort site was covered by housing and just its outline was marked out in the streets, so if you think the remains are rather scrappy, bear that little fact in mind. Now a large portion of the fort has been cleared for display and only the portion under Buddle Street remains largely unexcavated. ‘Largely’, because the great Wall scholar F. G. Simpson tunnelled under that road to check whether the junction of the curtain wall and the fort proved them to be of one build: they were. There are fine views of the fort and the surrounding shipyards to be had from the viewing tower that is part of the recent site museum.

The Defences

Wallsend east gate

Wallsend east gate

The fort was surrounded by a stone wall backed by an earthen rampart and, like all forts of its kind, it had rounded corners. In each of those corners was a corner- or angle-tower, whilst gate towers flanked each twin-portalled entrance (centrally in the north and south sides, and just north of the curtain wall on the westerns side). An eastern gate matched the western, but an additional (single-portalled) western gate was placed between the curtain wall and the south-west corner, probably to facilitate access to the civil settlement or vicus. Wallsend is unique in this asymmetric arrangement of its gates, a product of its location in an angle in the course of the Wall. Additional towers were placed between each gate tower and its neighbouring corner tower and – by analogy with other, better-preserved forts – the whole thing as probably finished off by a walkway shielded by a crenelated parapet. The fort defences were further enhanced by a ditch which continued the line of the ditch of Hadrian’s Wall itself.

The HQ building

CO's house, HQ (with forehall) and granaries

CO’s house, HQ (with forehall) and granaries

The best place to start our tour of the internal buildings is with the administrative centre, the headquarters building (principia). It lies at the junction of the two principal streets of the fort, the east-to-west via principalis and the north-to-south via praetoria. Unusually for a Hadrian’s Wall fort, this junction was covered by a forehall, a feature found in many continental forts and possibly used for training under cover. South of that lie the standard features of an HQ building: a courtyard, then a cross-hall (the origin of the basilical form later adopted for churches), and then a rear range of offices, the central chamber of which was the chapel of the standards (aedes signorum), under which was a strong room in which the unit’s savings were kept.

The CO’s house

To the east of the principia was the commanding officer’s house (praetorium), where he (and his family, including slaves) lived, comfortably separated from his soldiers. This was a ‘Mediterranean-style’, inward-looking courtyard structure, with four ranges of rooms around a central yard or (more likely) garden.

The Granaries and Hospital

The granaries and (right) hospital

The granaries and (right) hospital

West of the HQ were two store-buildings or granaries (horrea), recognisable by their raised floors and external buttresses, and another courtyard building that has been interpreted as a hospital. The raised floors helped deter vermin and moderate the temperate of any stored goods, especially grain (the Roman army ate spelt wheat and fed their horses barley and oats), whilst the buttresses served only to confuse scholars (since calculations show therm to have been structurally unnecessary and, in fact, they were even left off some granaries elsewhere).

The Barracks

Cavalry barrack

Cavalry barrack

One of the most interesting aspects of Wallsend is its cavalry barracks, split between men and animals. The pits set into the ground, designed to catch the less pleasant by-products of a reliance upon horses, have been identified at an increasing number of Roman military sites. These are invariably accompanied by very high phosphate readings when tested. Cavalrymen were organised in a turma of 32 men (two to each barrack block), whereas infantrymen were placed in a century (centuria) of 80 men (one to each barracks). Since Wallsend housed a mixed unit, both infantry and cavalry, and we have the cavalry here in the southern third of the fort, then the infantry seem to have been based in the northern third.

In the south-western part of the site, there is a splendid (albeit mirror image) reconstruction (capable of working when built) of the Chesters bath-house (not, please note, on the site of the Wallsend bath-house, which was probably further to the south-west). This will bring home just how inadequate ruins can sometimes be at giving a true impression of the magnificence of a building, especially when we finally get to see the remains upon which it is based at Chesters. The baths are periodically opened for inspection and nearby is a small herb garden, showing the range of culinary and medicinal plants that might be found in Roman times. Make sure you see the reconstruction Roman latrine north of the main changing room.

Reconstructed bath-house

Reconstructed bath-house

Now it is time to return to the museum, but before we do, note the line of the Branch Wall (marked in cobbles) running down towards the Tyne from the south-east corner of the fort. On our way past, we can also have a look at the monument recording the names of every single Roman whose name has survived from the Wall (with space so new discoveries can be added).

Once in the museum, there is much to do and see, including a rather dramatic representation of stratigraphy, the accumulation of archaeological layers over time. When you have seen everything, pressed all the buttons, and been lectured by the Geordie centurion, find your way to the observation tower (there are both lifts and stairs to get you to the top). Up there, a video demonstration dramatically illustrates how the site has changed over time. There is a fine shopportunity in the foyer to part you from your money before you leave, but don’t buy too much: you will have to carry it with you.

Wall Mile 0 [HB 139–41]

Wallsend and Wall Mile 0 from the air

Wallsend and Wall Mile 0 from the air

Exit the fort and museum site and turn left, crossing Buddle Street by the zebra crossing at the bend in the road (exercising all due care). If you have time to spare, the positions of the northern barracks and defences are marked out to your right, but we are heading elsewhere.

Excavated and reconstructed curtain wall

Excavated and reconstructed curtain wall

Here, behind some railings, we have another treat in store, for here is one of the few full-height reconstructions of the curtain wall. Closer inspection reveals that the replica is in fact built slightly to the south of the excavated wall, a series of short stubby posts marking the position of a series of pits which we now know formed berm obstacles. These would have been filled with something like thorn bushes to form the Roman equivalent of a barbed-wire entanglement. The excavated length is actually considerably more than that consolidated, but much still lies under plastic, awaiting the time when funds permit its consolidation too. When examined, it was found that the wall along here collapsed due to proximity to a stream. The collapse of bits of Hadrian’s Wall will become a recurring theme for our journey.

Now we can turn our attention to the reconstructed curtain wall. Although building regulations demanded that it be built to modern standards and with a completely inaccurate handrail at the back, it gives a good impression of the state of our knowledge of what the curtain wall actually looked like. Go towards the back, noting as you pass the severe weathering that the modern building inscription has already suffered. We shall briefly resist the temptation to mount the steps, but instead direct our attention to the base of those stairs, at the west end of the south face of the wall. Here, several different interpretations of a debate as to whether the curtain wall was plastered, whitewashed, or flush-pointed have been realised and it will be readily apparent that the whitewash option is already nearly completely vanished.

Pointing, rendering, and whitewashing

Pointing, rendering, and whitewashing

Next we can proceed up the stairs. Here it is possible to appreciate just how much room the narrower curtain wall of this sector (the wall to the west of Newcastle is built to a broader gauge) provides for a walkway, even allowing for a parapet. Note too the efficacy of the merlons at providing protection for defenders (although some might argue for broader merlons, these are details to which we have no definitive answers at the moment). This is a splendid example of the value of physical reconstruction; sometimes CGI just will not do.

Wall walk and parapet

Wall walk and parapet

Once we have finished inspecting this, and perhaps taken a look at the remains of the 19th-century colliery that used to sit atop the fort, it is time to start walking. Leave the fenced area and turn right down Buddle Street. We are going to be separated from the course of the Wall for a short distance, but don’t fret: we shall soon be reunited. At the roundabout, continue across onto Neptune Road, and then another roundabout and slight bend in the road takes us onto Fossway. After two more roundabouts, the Miller’s Dene recreation ground on our right-hand side marks the location of Milecastle 1, with the course of the Wall and Fossway converging but not yet meeting.

Milecastle 1 (Stott’s Pow) [HB 141; haiku]

Stott's Pow, site of Milecastle 1

Stott’s Pow, site of Milecastle 1

This milecastle has never been confirmed, although what has been interpreted as occupation material has been found. It used to be placed further to the east on Ordnance Survey maps. Nevertheless, both Horsley and MacLauchlan reported seeing it here so this is now the accepted location.

PLVad2

Corbridge (Part I)

Corbridge, along with Carlisle, is one of the pivotal sites of northern Roman Britain. It is near Hadrian’s Wall, but not part of it; it is south of the frontier with Caledonia, but always looked beyond it. And when Q. Lollius Urbicus set out to subdue that northern region, he seems to have started from Corbridge.

Corbridge Roman site from the air

Corbridge Roman site from the air

You will see it called many things (Corstopitum, Coriosopitum, Coria), but the name that seems to be endorsed by the Vindolanda writing tablets is Coria (which means a hosting place, an apt term for the junction of two roads by a river; remember, the Romans did not invent roads in Britain, they merely engineered them to be all-weather).

It is also crucial in the development of British archaeology, with the involvement of Francis Haverfield, the Father of Roman Britain as he was often called, and the training of some of the later big names in the discipline: the future Chief Inspector of Ancient Monuments, J. P. Bushe-Fox, began as a supervisor on the first campaign of excavations there, working with Robert Forster (who was a rowing partner of his brother). Fox it was who called in Eric Birley to supervise the clearance of the site in the 1930s, after it had been given to the nation, which developed into the second major campaign of excavations on the site. Ian Richmond became involved and work continued into the early years of the Second World War, but it was not until after the war that the major series of training excavations got under way, lasting up until the early 1970s. There was rescue excavation too: when the A69 bypass was put in and the new site museum constructed. Nevertheless, what we know of Roman Corbridge is derived from only a tiny proportion of its total area.

So, with that by way of introductory background, it is time to begin our virtual visit to the Roman site at Corbridge. Enter the museum but go straight out onto the site and leave the museum until later; everything should make more sense by then (you might also think in terms of suspension of gratification or cherries/icing on top of buns/cake).

In this first part, we shall consider the structures to the north of the Stanegate.

At the heart of the English Heritage site as you now see it lies the original forts which are, paradoxically, barely visible now. The first was the largest and they lasted from around AD85 to about AD163 and were replaced by two novel, walled, military compounds, each containing a detachment from one of the British legions. The stone granaries from the last fort were retained, presumably to supply the legionaries, since they were also walled off and these are the first thing you see as you venture onto the site.

The granaries at Corbridge

The granaries at Corbridge

Like all Roman military granaries, they have a raised floor with ventilated underfloor area; the hatchway at the south end of the west granary (Site 10) is clearly visible (it was blocked when first excavated but the blocking is long gone). Each had a raised loading platform at the south end, but the continual raising of the level of the Stanegate meant these ultimately became inaccessible: the awkward gap between granaries and road was Roman, not modern. The east granary (Site 7) still has an intact mullion in one of its ventilator slots (although the lintel above it has been replaced, ‘borrowed’ from elsewhere on the building).

The fountainhouse under excavation in 1907

The fountain house under excavation in 1907

Next to the granaries are the remains of the fountain house (Site 8) of the aqueduct. This was built after the forts had been levelled, the aqueduct swerving around the fort bath-house on its way to the site from the north (the water was drawn off the Cor Burn north of the A69). The legio XX Valeria Victrix proudly proclaimed their part in constructing the feature (and perhaps with it the aqueduct) and its significance should not be overlooked, for this is just one sign of a deliberate attempt at the urbanisation of Corbridge. Forts did not have prominent aqueducts and terminal fountain houses: towns did.

Tucked away behind the granaries and next to the aqueduct is Site 12, a strip-house of no great significance, other than it was here in 1908 that a hoard of forty-eight gold solidi from the late 4th century AD (probably some time after AD 383) were found. If gold is your thing then these should ding your bell; personally I find a box full of rust far more interesting (and informative), as we shall see.

Site 11

Site 11

To the east of the fountain house is situated one of the most unusual (and, so far, unique) buildings of Roman Britain: Site 11. A near-square courtyard structure, with ranges of rooms on four sides, it bears a close resemblance in plan to the Halifax Piece Hall and may well have been intended to have stairs in each corner. Its model may have been the Macellum Magnum built by Nero in Rome. Whatever it was intended to be, however, it was never completed, for the ambitious plans for Corbridge appear to have changed and only the west and south wings were finished. When it was found, the archaeologists bickered over its interpretation (Haverfield thought it a legionary headquarters building, Forster a forum).

Finally, to either side of this magnificent range of structures, there were ordinary strip houses of the sort you could find on most Romano-British settlements: Site 9 to the west (now replaced by the museum building) and Site 20 to the east, at the edge of the modern site.

So much for what you can see. What is no longer visible is the underlying military history. Both Site 9 and Site 20 lie directly over the ramparts of the cohort-sized fort that succeeded the earliest, larger fort. The courtyard of Site 11 contains (to the west) part of the headquarters building of the fort (the shrine of the standards to be exact), preserved because it was used as a builders’ hut during the construction of the massive courtyard building, and part of the commanding officer’s house. The post-war training excavations concentrated on looking beneath Site 11 and attempting to untangle the sequence of four forts: Phase I (the largest, c.AD86-103); Phase II (c.AD105-22); Phase III (c.AD122-38); and the first stone fort (c.AD139-63).

In the next part, we shall examine the area south of the Stanegate, then finally we can think about the Corbridge Hoard, a forgotten treasure of Roman Britain.

The PLV eboojs

Wall Mile 3

Wall Mile 3 [HB 142–50]

The line of the Wall is continued along Westgate Road, across the triangular traffic island, where it ran under the statue of Stephenson, then across Neville Street (which runs in front of the railway station), to be found again on the same line outside the Mining Institute building, where its course is marked in rather faded pink concrete, accompanied by a plaque giving details.

The line of the curtain wall outside the Mining Institute

The line of the curtain wall outside the Mining Institute

Now it is time for a couple of detours before we continue following the line of the curtain wall as best we can. Before we depart the line, however, we must bid farewell to the Vallum, of which there is nothing to see here, but which once very clearly terminated at Newcastle. First we will head up to the Great North Museum – Hancock (it is worth it, trust me) and then come back and have a brief look at the remains of Newcastle fort.

Great North Museum – Hancock

Inscription from Milecastle 38 in the Great North Museum

Inscription from Milecastle 38 in the Great North Museum

For many years, some of the best finds from the Wall were held in the Museum of Antiquities in Newcastle University (to which you will still find references in guide books), but the building has now gone and the contents have been transferred to the new Great North Museum just over the road. The easiest way to get to the GNM is to take the Metro (entrances both inside and outwith the railway station) up to the Haymarket station (second stop when proceeding northwards from Central Station) and then following pedestrian signs for the Great North Museum. The enthusiastic walker, or those who dislike underground travel, may choose to walk, but allow 20 minutes from Central Station to get there (via Grainger Street, Newgate Street, and Percy Street).

Entrance to the museum is free, photography is allowed, and the Hadrian’s Wall gallery is straight through the main entrance, on through a brief natural history interlude, before passing a couple of trees with loitering stuffed wolves (no, I don’t know what they’re doing there either). We are confronted by a huge video presentation that allows you to insert your initials on a stone block and a rather disinterested Roman soldier maunders around through a variety of weathers. Great for the kids but perhaps overkill for the rest of us. All around you will find artefacts, inscriptions, and models to explain the story of the Wall. Dive in, press some buttons, and enjoy.

Altar to Mithras in the Great North Museum

Altar to Mithras in the Great North Museum

When you are finished, retrace your steps (with or without the Metro) to the Central Station. Go on past the Mining Institute down towards the High Level Bridge, and you will see the Black Gate (part of the castle) opposite a pedestrian crossing at a set of traffic lights. Cross over and head towards the viaduct arches and, on the other side, the pavement outside the west side of the keep (you can’t miss it; it looks like… a castle keep!).

Newcastle fort (PONS AELII)

Newcastle was the original eastern terminus of the Wall and yet no fort was built here until the Antonine period, which was probably when the bridge across the Tyne was constructed. The fort is mostly situated underneath the castle but it was originally 0.64ha (1.53 acres) in area. The garrison included the cohors I Ulpia Traiana Cugernorum in the 3rd century and cohors I Cornoviorum in the 4th. A stone recording the cohors I Thracum may refer to another garrison from Newcastle, or possibly from an as-yet-undiscovered fort in Gateshead. The fort does not seem to have been attached to the curtain wall (there seem to have been buildings to the north of it) and it was, rather unusually, polygonal in form.

HQ & CO's house of Newcastle fort marked out

HQ & CO’s house of Newcastle fort marked out

Marked out on that piece of pavement are parts of the headquarters building (principia) and the commanding officer’s house (praetorium). The orientation of these fragments begins to allow an understanding of how the fort sat above the river. There is more to see, however. Head round to the north side of the keep, next to the railway arches, and you’ll see parts of two granaries marked out, one of them partly under the viaduct itself.

Granary marked out next to castle keep

Granary marked out next to castle keep

The eponymous bridge at Pons Aelii has yet to be located (dendro-chronological dating of timbers supposed to have come from it proved to be medieval) but it must have been situated close to where the Swing Bridge is now located. Recent work in Gateshead has suggested that there may have been a military base there, too (elsewhere in the empire, many bridges over major rivers had military bases at either end).

The likely site of the Roman bridge from the air

The likely site of the Roman bridge from the air

When we return to tracing the course of the wall, we enter into a realm of uncertainty and speculation between the Mining Institute and Melbourne Street, where it has recently been recorded by excavation. We must now head up to the cathedral to get our bearings. Some antiquaries claimed the curtain wall passed through the cathedral, whilst others others advocated that its course took it nearby, but we shall turn right into the churchyard, through Amen Corner, just to its south, and down the steps at the eastern end of it, which bring us down to Dean Street. This street lies on the line of the now subterranean Lort Burn, originally crossed by Nether Dean Bridge, leading from the churchyard to Pilgrim Street, and it is generally held that the Wall must have bridged the burn in this vicinity. We cross the road and up the steps (now called Low Bridge), through the pedestrian precinct, and end up confronting the monstrous Swan House roundabout. The Roman road up from the Pons Aelii must have passed through the Wall near here, so another gateway like those at Stanwix and Portgate is to be anticipated.

Use the subway to get across the roundabout, aiming for the 17th century Holy Jesus Hospital. Arriving on Melbourne Street, with the Hospital to our left, we are close to the line of the wall, which runs slightly to the south of us. Further along Melbourne Street, near the point where it is crossed by Gibson Street, excavation identified the curtain wall with the by-now-familiar pits on the berm. Carry on to Howard Street (the Wall is now to our north) and turn left at the junction with Crawhall Road and head north. At the junction with Coquet Street, we have a choice: follow the approximate course of the Wall across the Ouseburn, or get an aerial perspective from Byker Bridge.

Byker Bridge, the Ouseburn, and the site of Milecastle 3

Byker Bridge, the Ouseburn, and the site of Milecastle 3

If you decide to follow the Wall, turn right down Coquet Street, which almost coincides with the line of the Wall, and head east. Follow the road round (we cross the likely line of the Wall again on the way) until it meets Stepney Bank and turn right down the hill. When we reach Ouseburn Farm (again on the posited line of the Wall) we can take the footpath to the right of it to get down to Foundry Lane. At its junction with Leighton Street, we take the steps to our left and head up the east bank of the burn. This takes us up to Back Stephen Street and ultimately up to the main road next to the buildings located close to the position of Milecastle 3.

If on the other hand you want to get the aerial perspective, carry on up Crawhall Road and then turn right at the junction with the main road (A193, New Bridge Street) to walk along the southern pavement of Byker Bridge. From here you can look down and see how the Wall had to cross this small valley, probably passing under Ouseburn Farm, to reach the location of Milecastle 3 at its eastern end.

Milecastle 3 (Ouseburn) [HB 142; haiku]

Etching from Stukeley showing the location of Milecastle 3

Etching from Stukeley showing the location of Milecastle 3

Some confusion arises over the precise position of Milecastle 3 (Ouseburn), but it is very clearly shown on the near (east) side of the valley on an etching published by Stukeley, so quibbles of this nature need not detain us for too long. Although the physical remains of the milecastle have never been seen, an altar set up by a priest (sacerdos) called Iulius Maximus almost certainly comes from it (we have several times noted the association of altars with milecastles, so this may well be the nearest thing to a smoking gun we are going to get).

PLVad2

Wall Mile 27

Wall Mile 27 [HB 191–210]

As we look downhill, the curtain wall was underneath the southern carriageway of the road, with the ditch immediately north of the road, in the field to our left.

In the 18th century, the Military Road was of course originally constructed without a tarmac surface and a famous woodcut shows one of the lower courses of the curtain wall peeping through the southern carriageway at Walwick, just to the east of Milecastle 28. It was still visible in 1907, when Maria A. Hoyer wrote ‘at this point, part of the foundation becomes visible. It gave one a thrill to look at those venerable stones; surely they merited a salute, a genuflection! The road here mounts up steeply, and the rush of the rainwater probably keeps the stones bare.’ By the time Jessie Mothersole passed here less than two decades later, the road had been tarmacked and the curtain wall was no longer visible.

The Wall showing through the Military Road at Walwick

The Wall showing through the Military Road at Walwick

At the bottom of the hill the Military Road swings north, off the line of the Wall, to make for the bridge at Chollerford, in order to cross the North Tyne. The Wall itself just carried straight on. We will follow the modern road northwards until we come to the signposted entrance to Chesters fort (now managed by English Heritage),

Chesters with the River North Tyne from the air

Chesters with the River North Tyne from the air

The site of Turret 27B is inaccessible, in the grounds of Chesters House, whilst Turret 27A was removed soon after construction to make way for Chesters fort (it was situated under the northern edge of the headquarters building of the latter, if you must know).

Chesters from the air

Chesters from the air

Chesters fort (CILVRNVM)

Chesters is important for many reasons, not least as the house (The Chesters) was the home of John Clayton. In the 19th century, he was one of the leading lights in the conservation of the central sector of the Wall. The happy coincidence of the Military Road choosing to avoid the crags between Wall Miles 34 and 45 and Clayton owning the estate that included that stretch, combined with his passion for archaeology, meant that this part of the Wall at least received more care and attention than it had since Roman times. Elsewhere, at that time, landowners and tenants were still merrily grubbing it up and, as we have seen, even dynamiting it in some extreme cases. Any suggestion that the curtain wall might have survived in any substantial form had the Military Road not been built is, at best, debatable (and, as we shall see later, the road ironically helped preserve the wall in places).

The fort itself is 5.6km (3.5 miles) from Carrawburgh and is 2.3ha (5.75 acres) in area. It sits astride the Wall and needed two extra gateways (instead of the usual four) to accommodate this inconvenience. Within the fort, the remains of the commanding officer’s house and the headquarters building (including its subterranean strongroom) are on display, as is a pair of cavalry barracks. Down by the river North Tyne are the remains of the fort bath-house, preserved to an impressive height by hillwash. Naturally, John Clayton set about excavating parts of the fort. Set in formal parkland, it can now look rather lush and incongruous in comparison with the bleak upland site at Housesteads, which he also owned.

The best strategy for a visit to Chesters is to see the site first and then do the museum, but you do what you feel most comfortable with, and you may find the weather dictates your course of action (and the tea shop, Lucullus’ Larder, is a handy retreat for the peckish). For our purposes, it is the fort first.

Unlike any of the other forts we have seen to the west, Chesters does not cower meekly behind the line of the curtain wall but in fact boldly protrudes to the north. This provided an unusual challenge to its constructors since, if they used the usual pattern of four gateways, one side (either north or south) would end up with three gateways, the other only one. They opted to give it an extra two ‘minor’ single-portalled gates to the south of the wall and have three twin-portalled ones to the north of it.

The north gate

The north gate

Any tour of the fort will begin at the north gate, to which the path from the museum leads you. This is the porta praetoria, the main gate facing northwards and, importantly (and unlike Housesteads), facing the enemy. A twin-portalled gateway, as you might expect, this was the main one facing into Barbaricum. There is a very obvious stone-lined channel under the western carriageway – drains and aqueducts nearly always left and entered forts at the gates (although Housesteads has already presented us with one exception to that rule). This example, however, is the aqueduct bringing water into the site (the main sewer carrying it out passed out through the slightly lower east gate, as we shall see). The aqueduct channel seems to have followed the contours round Lincoln Hill to get to the fort, with its source reported to be further up the valley of the North Tyne (although this has not been tested by excavation). An inscription of around AD 180 records the construction of an aqueduct, although we have to presume the garrison didn’t spend the best part of half a century without water, so it may have been an additional one or a replacement.

The west gate

The west gate

Having admired the north gate (the usual two portals, one later blocked, with flanking guardrooms) we can head off across the fort (there is usually a mown strip to guide us) towards the west gate, noting as we pass it a short length of the western curtain wall of the fort before we reach our goal. The northern guard chamber has very obviously been re-used as accommodation at a later date, since it has had a hypocaust inserted to keep its inhabitants cosy (and a fragment of it remains in the north-west corner). Adjacent to the south tower we can see the junction of Hadrian’s Wall with the fort, confirming that this west gate lay north of the wall. The curtain wall was in fact constructed before the fort and had to be dismantled to insert the fort. The usual features are present (threshold blocks with door stops, pivot holes, large opus quadratum blocks in the spina and inserted into the guard chamber walls) so we may note those and move on.

Interval tower

Interval tower

The path next takes us to the south-western interval tower (the western minor gate and the south-western corner tower have not been uncovered for display) where we can see that, unlike the turrets on Hadrian’s Wall, this fort tower has a central doorway at its base. We may briefly admire the eavesdrip channel along the base of the tower before trotting on towards our next gate (there are six, don’t forget). We can move on to the south gate, another twin-portalled structure, but this one still retaining traces of its blocking. Propped up against it is a large monolithic slab with a central lewis hole and two pivot holes, one of them intact. This is an example of an upper pivot stone, designed to sit above the spina and receive the upper pivots of the gate leaf on either side of it.

A three-legged lewis (Wikimedia)

A three-legged lewis (Wikimedia)

What is a lewis hole? They were used on large blocks of stone to enable them to be lifted with sheer legs. A three-part wedge with a central removable shackle (known as a three-legged lewis or St Peter’s Keys) was inserted into a splayed rectangular hole in the stone which, when the middle component was inserted, would lock in place to be lifted. It is a characteristic Roman technique, not seem before and seldom afterwards in Britain.

Moving on, we pass another interval tower before reaching the corner tower, located in the centre of the rounded south-east corner of the fort wall. Unlike interval and gate towers, corner towers tended to be wedge-shaped, so that their side walls met the curtain wall at a tangent in either case. It is less noteworthy that this too has a central doorway.

The SE angle tower

The SE angle tower

Now we head north along the east defences and reach the only minor gate that is displayed. This, as mentioned above, was a single-portal gateway which gave access to the area south of the Wall and specifically to the civil settlement and the baths. Note that in its surviving form, there are two gate leaves (one pivot hole on either side) with a central stop block.

The minor E gate

The minor E gate

And so to the last gateway, the main east gate. Here we can see a main drain passing out through the southern portal, but it is of course north of the wall, so not destined for the bath-house. The northern gate tower has been constructed over the backfilled (with rubble) ditch of the original version of Hadrian’s Wall. Both portals ended up being blocked and the lack of wear on the threshold blocks suggests neither were very heavily used. So much for all that effort to add extra gates.

Hypocaust in the CO's house

Hypocaust in the CO’s house

After this heady tour of the defences and an orgy of towers and gates, it is time to turn our attention to the internal buildings that are there to be inspected. The first will be the commanding officer’s house (praetorium), the nearest and most perplexing of the structures, given the welter of inserted hypocausts, varying floor levels, and different styles of construction. If we enter it through the little gate next to the tree, we are immediately able to admire the finely moulded decorated plinth course on the north-east corner of the structure. Just to the south are some brick pilae from one of the many heating systems, but if you are willing to take a few paces even further south you will find an excellent example of a brick-arched flue through the east wall. Don’t worry, we’ll wait. We will next move a little to the west to see another heated room with a raised threshold, showing the level the commanding officer actually lived at, with all this heating technology at his disposal. Note how the threshold block is worn smooth in the middle and that there are two rectangular recesses on either side to receive the upright stone jambs, now missing. Doubtless you will already have spotted the channel leading to the socket for the door pivot. We will carry on moving westwards and make a left turn towards where the courtyard ought to be. The floor levels are still raised to either side of us and it becomes apparent that the standard courtyard-style praetorium has here been subverted in the later period, with additional rooms being added in the courtyard space. If we turn right we can now head west again, across where the courtyard would have been, and make for the headquarters building (principia).

Side entrance to the HQ building

Side entrance to the HQ building

As at Housesteads, the HQ has entrances on either side as well as its main northern one, these side entrances apparently serving more than one purpose. The one nearest the praetorium would certainly provide a useful short cut for the commanding officer, but the threshold of this eastern doorway shows clear evidence of wheel ruts, implying that carts were driven into the building on a regular basis. You may well wonder why this might have been. Let us enter the structure through the door and enter the cross-hall, noting the dais (the tribunal) ahead of us (this one clearly had a hatch underneath it; what were they storing there? And was it brought in with carts?).

Underground strongroom in the HQ building

Underground strongroom in the HQ building

To our left, in the range of offices, is a magnificent, vaulted underground strong room, where the unit savings would be kept (perhaps the carts were moving money around!). Mileage may vary as to whether we may enter it (sometimes it is flooded), but note how small the steps are (best to go down with your feet sideways) and the large monolithic stone jambs used here. When we are done here, we can head across the courtyard again and enter the courtyard. As ever, we find a peristyled rectangular yard with an eavesdrip running round it, indicative of a pent roof, and over in the north-west corner is a well (which still often contains water) which is worth inspecting.

The well in the HQ courtyard

The well in the HQ courtyard

A few moments may be devoted to pondering the well and its sacred significance before turning to face the south and the rear range of offices, where the standards would be kept. Look down at the paving on the western side of the courtyard. There, on a large circular boss, is one of the largest phallic symbols we have yet witnessed. This seems like a formidable apotropaic insurance policy. Now we can turn and head northwards, out of the main entrance of the HQ, and towards the barrack buildings ahead of us.

Phallic charm in the HQ courtyard

Phallic charm in the HQ courtyard

Before entering the barracks enclosure, we should pause and note that not all of the barrack buildings are on display. Only five of the contubernia, the rooms in which the men were accommodated, are now uncovered, at least three more remaining buried beneath our feet. In front of us are two symmetrically arranged buildings, each with officers’ quarters at the far end and a verandah (continuing the roofline) in front of the men’s rooms. A central drain (originally covered) runs along the centre and fragments of columns can be seen (although Gibson’s photographs of the first excavations suggests things have moved around a bit since the 19th century). The barrack rooms housed the men, possibly with a central timber partition separating a front storage area from the rear sleeping area, whilst the end rooms would house the decurio who commanded each turma of cavalry (nominally 32 men) and his NCOs, including his deputy (the duplicarius, on double pay), the standard bearer (signifer), and the sesquiplicarius (on one-and-a-half times pay!). Before we leave the barracks, we need to do a quick calculation. Remember that there are eight men to a room and 32 to a turma? If we have at least eight rooms to a barrack, then it is likely that each building housed two turmae and that the officer’s quarters at the east end were duplicated at the unexcavated west end, making a double-ended barrack (we know of such structures from other cavalry forts elsewhere in the empire). After all that maths, we may well feel that we could do with relaxing in the fort bath-house. Fortunately, Chesters has one of the best preserved.

The barracks under excavation

The barracks under excavation

Exit the barracks, head east past the east gate and down the hill, pausing on the way to examine a short length of Hadrian’s Wall that is exposed. Excavation a little further to the east, between here and the river, found that the first clay-bonded wall collapsed spectacularly and had to be rebuilt with mortar.

The baths

The baths

Carry on down the hill to the enclosure containing the baths. Before entering, you can appreciate how the hill-wash, the soil moved downhill with time, has helped protect the building, since the tops of the standing walls reflect the profile of the hillside leading down to the riverbank. This is also a good time to fix the baths building in your mind, because when we get to Wallsend we are going to see a reconstruction of it (albeit a mirror image, just to make your brain hurt a little bit).

The apodyterium with its niches

The apodyterium with its niches

Down the steps, we enter through the porch to the changing room, the apodyterium, with its niches which may have held the bathers’ clothes (although there is a view that these were niches for statues of divinities). In a small delve next to the niches you can see the original floor level, revealing that the low ledge there was in fact originally a bench, perhaps lending credence to the clothes storage hypothesis. We can now move southwards and immediately turn right and right again to look at the sudatorium, the Ridiculously Hot Room (it had its own heating system under it, separate from the main baths).

Jambs, threshold, and pivot hole in the sudatorium

Jambs, threshold, and pivot hole in the sudatorium

This is particularly interesting as it has more surviving examples of monolithic stone door jambs, as well as a fine example of a worn threshold similar to the ones we saw in the CO’s house, complete with pivot hole and location slot. Back out of this balneal cul-de-sac and turn right into the main bathing area, with the warm room (tepidarium) and then the hot room (caldarium). We are actually standing at the level of the base of the hypocausts, the floor level being betrayed by a threshold block to our left.

Before we go any further, turn round and look at the step we just came down to get here: it a curiously shaped stone. This in fact a voussoir made of tufa (light and fire-resistant), just one remaining component of a series of arches that ran along the length of the baths, slotted to hold thin bricks between these ribs and thus provide hollow tubes through which warm air (which was carried up the walls from the heating below) could also heat the roof space. All clever stuff.

The hot plunge bath and its window

The hot plunge bath and its window

Now we can move towards the south end, noting the hot plunge bath to our right and, behind it, the remains of a window through the wall. The south end contained the area where the fire actually burnt, beneath a large bronze water tank (now long gone), to provide the hot water for the plunge. We may sneakily pass out of here through the flue, noting as we go that there was a second bathing suite immediately to the east, and then we can turn left and left again to take us along the eastern side of the exterior of the building, buttressed for extra strength, to the latrines at the far end.

The north end of the baths

The north end of the baths

This area has been heavily damaged by the river in the past, before it was ever excavated, but we can make out the sewer channel running around the seating area, whilst down to the right, nearer the riverbank, are examples of opus quadratum with their increasingly familiar lewis holes. We can finish with the baths by heading back along the path, around the exterior of the building, and back up the stairs. Now it is time to leave the fort, but if you haven’t already inspected it, this is your cue to visit the museum.

Chesters museum

Chesters museum

John Clayton’s son Nathaniel formed a small museum at Chesters (still lovingly tended in as near its original condition as possible) just before the First World War, housing the family collection of artefacts and inscriptions garnered not just from Chesters but from all the sites within the original Clayton estate, including Housesteads, Vindolanda, Great Chesters, and Carrawburgh. Its lapidarium is truly impressive, with rows of altars, milestones, and sculpture, and shelves of lesser stonework, including building stones from the Wall. It is worth devoting some time to and there is a treat awaiting in the back room, where some of Ronald Embleton’s original reconstruction paintings, undertaken for H. Russell Robinson’s book What the Soldiers Wore on Hadrian’s Wall, are hanging. The museum has only recently been refurbished and relit (a process that required the careful rehousing of a colony of bats) and is a splendid example of what can be achieved, and a far cry from when one of the past curators complained about the birds flying around the main gallery and leaving their calling cards on the cases.

The garrisons of Chesters included the cohors I Delmatarum in the 2nd century and the ala II Asturum from the early 3rd onwards. The latter originated in Asturia, in what is now Spain. It has been pointed out that the name Cilurnum may owe something to a people called the Cilurnigi from that same area of Spain. You could say that this is a little bit of Northumberland that is forever Spain.

As we leave Chesters, we must cross the Military Road again (because there is a pavement on the far side) and walk northwards towards Chollerford. At the roundabout, we follow the signs across two roads until we finally get to the modern bridge. There was a medieval predecessor just downstream, but it is the Roman prototype even further away to which we now turn our attention.

On the far side of the bridge there is a small gate on the south side of the road and that leads to a path that takes us along the side of the old railway line to the Roman bridge abutment, a distance of about 800m if you must know.

Chesters bridge abutment

177767079_8e85138f37_b

The bridge abutment nestles in a copse of trees on the southern riverbank and is still an impressive monument. The curtain wall is terminated in a large square tower, thought to have housed a waterwheel (since it has a leat leading into it, although it isn’t clear where the water went afterwards). The abutment itself is a large apron constructed of opus quadratum blocks, each layer originally held together with cast lead strips (you can still see the channels for these in the surface of the stones) rather than with cramps between blocks. Embedded within the apron, thought to have been constructed as part of a 2nd-century makeover of the bridge, we can still see the outline of one of the piers of the original Hadrianic bridge.

177768097_06d18335c3_b

The bridge abutment phallic symbol

The bridge abutment phallic symbol

Looking down on the abutment from the riverbank side, move towards the northern (upstream) end and look at the basal courses. On the second row up, and assuming the abutment is not flooded, careful examination will reveal yet another truly outstanding example of a phallic symbol. Again, good luck was obviously as important as a lead lattice in holding together a Roman bridge. Finally, in the stone park beneath the trees, are the remains of a crane, probably used in the construction of the structure, whilst lying down on the apron opposite it is a decorative column that originally adorned the bridge parapet.

Decorative column lying on the abutment

Decorative column lying on the abutment

Milecastle 27 (Low Brunton) [HB 191; haiku]

Milecastle 27 (Low Brunton) lies isolated in the middle of agricultural land, but occasionally peeps out on aerial photographs. It was excavated in 1930 and 1952 and found to be of the long axis type. The finds were paltry, just one piece of undatable pottery.

roadsad