Wall Mile 0 [HB 371]
Just when everybody has been telling you Hadrian’s Wall is 80 Roman miles long, you discover that in fact it was 81! Due to an accounting error (or perhaps somebody simply got out of bed on the wrong side one wall-numbering day), the first Wall Mile is Wall Mile 0, not Wall Mile 1 as you might expect. To be fair, nobody has ever actually found MC1 or even MC0, nor are they completely sure where they might be, since it all depends where the start is measured from. Of course, this is (all too literally) a measure of our lack of understanding of the problem, rather than any obfuscation on the part of the Romans who, so far as we know, never even bothered numbering it.
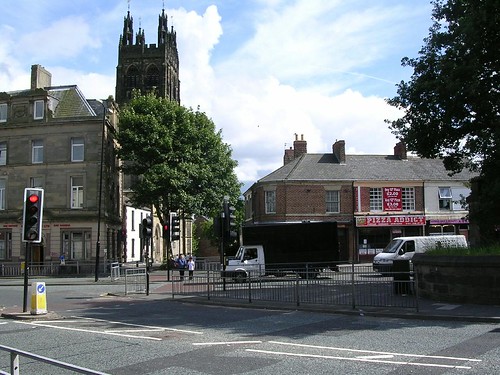
If we continue eastwards along Fossway it eventually turns into Maurice Road and then, striking north-eastwards, becomes Neptune Road and then Buddle Street. At this point, the Segedunum museum at Wallsend fort becomes evident to our right and, to our left, a reconstructed length of the curtain wall.

Wallsend and Wall Mile 1
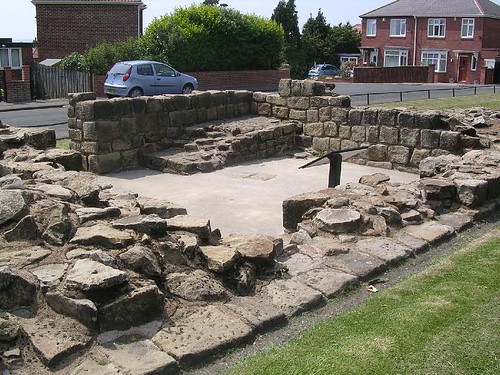
Closer inspection reveals that the replica is in fact built slightly to the south of the excavated curtain wall, a series of short stubby posts marking the position of yet more berm obstacles. The excavated length is actually considerably more than that consolidated, but much still lies under plastic, awaiting the time when funds permit its consolidation too. When examined, it was found that the wall along here collapsed due to proximity to s stream.

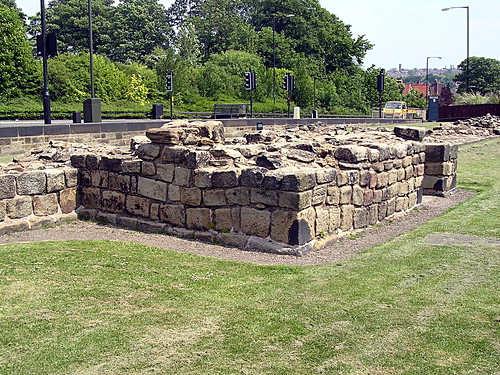
The reconstructed curtain wall next to the original
Now we can turn our attention to the reconstructed curtain wall. Although building regulations demanded that it be built to modern standards and with a completely inaccurate handrail at the back, it gives a good impression of the state of our knowledge of what the curtain wall actually looked like. Go towards the back, noting as you pass the sever weathering that the modern building inscription has already suffered. We shall briefly resist the temptation to mount the steps, but instead direct our attention to the base of those stairs, at the west end of the south face of the wall. Here, several different interpretations of the plastered/whitewashed/pointed debate have been realised and it will be readily apparent that the whitewash option is already nearly completely vanished.

The reconstructed curtain wall
Now we may proceed up the stairs. Here it is possible to appreciate just how much room the narrower curtain wall of this sector provides for a walkway, even allowing for a parapet. Note too the efficacy of the merlons at providing protection for defenders (although some might argue for broader merlons these are details to which we have no definitive answers at the moment). This, together with the Vindolanda reconstructions, is a splendid example of the value of physical reconstruction; sometimes CGI just will not do.

Experiments in whitening the Wall
Once we have finished inspecting this, and perhaps taken a look at the remains of the old colliery that used to sit atop the fort, we may cross over and head for the entrance of the museum.
The order in which we proceed is a matter of taste, but for our purposes we will visit the site first and then look at the museum.

The reconstructed parapet and walkway on the curtain wall
Wallsend fort (SEGEDVNVM)

It was once thought that Wallsend fort was an afterthought, constructed when the course of the Wall was extended in the Hadrianic period, although this has recently been questioned. Occupying 1.6ha (4.1 acres), it was only some 6.4km (4 miles) from Newcastle. The garrison was cohors II Nerviorum in the 2nd century and cohors I Lingonum in the 3rd and 4th centuries and both of these were part-mounted.

Wallsend from the air
Before the campaign of excavations in the 1970s, the fort was covered by housing and just its outline was marked out in the streets. Now a large portion of the fort has been cleared for display, with fine views of it and the surrounding shipyards from the viewing tower that is part of the recent site museum.
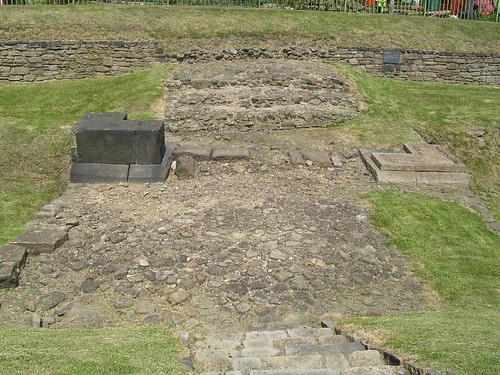
We may examine the remains of the commanding officer’s house, headquarters building (with its forehall, a feature found in many continental forts and possibly used for training under cover), granaries, and hospital (another of those extra courtyard buildings).
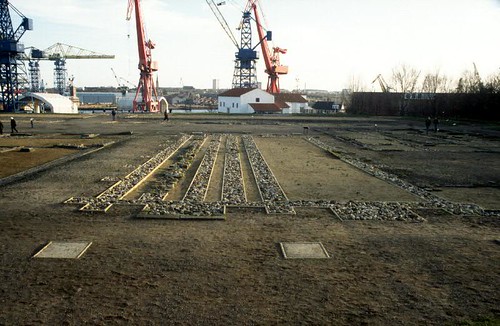
Granaries at Wallsend
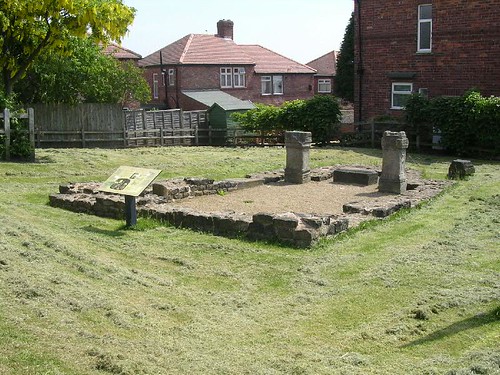
One of the most interesting aspects of Wallsend is its cavalry barracks, split between men and animals. The pits set into the ground, designed to catch the less pleasant by-products of a reliance upon horses, have been identified at an increasing number of Roman military sites. These are invariably accompanied by very high phosphate readings when tested.

The reconstructed bath-house
In the south-western part of the site, there is a splendid (albeit mirror image) reconstruction (capable of working) of the Chesters bath-house (not, please note, on the site of the Wallsend bath-house). This will bring home just how inadequate ruins can sometimes be at giving a true impression of the magnificence of a building. The baths are periodically opened for inspection and nearby is a small herb garden, showing the range of culinary and medicinal plants that might be found in Roman times.

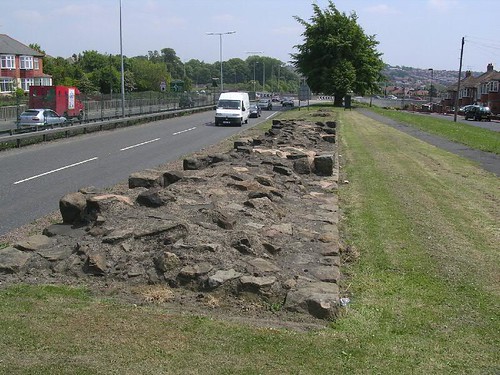
The Branch Wall
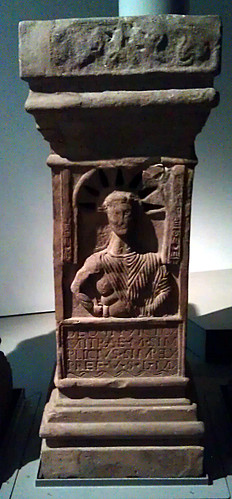
Now it is time to return to the museum, but before we do, note the fragment of the Branch Wall running down towards the Tyne from the south-east corner of the fort. This was found when the slipway for the RMS Mauretania was being constructed at Swan Hunter’s, moved to a nearby park and re-erected, then moved back here once the Segedunum project was under way. Part of the Branch Wall, however, was put aboard the RMS Carpathia, which was fitting out at the time, and appears to have been present when that ship went to the aid of the Titanic, and may even have been the only piece of Hadrian’s Wall to have been sunk by a U-boat in 1918! There is a model of the Carpathia in the industrial section of the museum. On our way past, we can have a look at the monument recording the names of every single Roman whose name has survived from the Wall (with space so new discoveries can be added).
Once in the museum, there is much to do and see, including a rather dramatic representation of stratigraphy, the accumulation of archaeological layers over time. Once you have seen everything, pressed all the buttons, and been lectured by the Geordie centurion, find your way to the observation tower (there are both lifts and stairs to get you to the top). Once up there, a video demonstration dramatically illustrates how the site has changed over time.
Leaving the museum, if you want a closer look at the Branch Wall, turn right onto the main road, then immediately right again, and head up onto the bridge that takes the cycle path round the back of the fort. Heading west, you will soon see the last bit of the Branch Wall, unencumbered now by railings.

The mobile Branch Wall from the slipway
Milecastle 0 [Not mentioned in the HB; haiku]
It has been speculated that the curtain wall may have terminated in a final milecastle, but there is absolutely no evidence for this, although redevelopment of the old Swan Hunter yard may well ultimately reveal the truth.

Sunset over Wallsend
This, then, is where we shall finish our journey, next to the remains of the Swan Hunter shipyard, where the Wall trundles merrily off towards the Tyne. Once, Geordie kids paddled and splashed around the remains of the Wall as it disappeared into the water, but that time has long gone. For us, Wallsend assumes its true role, as the end of our Echtmauerwanderung along the Wall.


You must be logged in to post a comment.